Category Archives: Uncategorized

Baby Shower Hiatus

Posted on
Baby Shower Hiatus

So I haven’t posted much in the past few weeks, I know. I have been planning, planning, planning for a baby shower for my lovely sister-in-law, and now that it’s finally over, I’ll share what all I was up to.

My inspiration for the shower came from these adorable little bags. What a cute little saying! So I was off and running.

Now I’m not graphic designer, I must say. But my wonderful husband is pretty handy with Adobe Creative Suite and was willing to lend me a hand with some designs. He designed some adorable invitations for me (which I forgot to take a picture of), as well as all of the game cards, etc. But we’ll get to those later. My first creation was a bannerĀ  made with my Cricut. I love that thing.

Image

The color scheme I chose was black and white and a turquoise-ish blue. Nice and boyish but classy and elegant. That window where I hung the banner is right behind the table in my dining room. It looked a little bare hanging up there all by itself, though. So I decided to make some large pom-poms from tissue paper. I love how these turned out.

Image

It was really hard to get a decent picture right in front of that window. Especially since the sun was actually shining that morning! Woo hoo! We take all of the sun we can get at this time of year in the Pacific Northwest. Anyways, these things were so easy to make and they looked just perfect hanging on either side of the banner. All I did was take an entire pack of tissue paper (on sale for $.99 a pack at Target) and accordion fold all of the sheets together. Then I cut a little notch in the center and tied them with a twisty tie. I rounded off the ends to give it a flowery kind of look, and then fluff them up. Easy peasy. I tied a nice turquoise ribbon to them and tacked them to the ceiling with some cute black and white thumb tacks.

You might have noticed the tops of some other tissue paper puffs in that last picture. Well, I made those to go in the vases that I painted. Yep, I painted some vases. After seeing this post on Pinterest, I knew I had to try it. So what better reason than baby shower decor?? I found a couple of vases at the thrift store for a dollar a pop. Can’t beat that! So I set to work. They turned out beautifully, I think.

Image

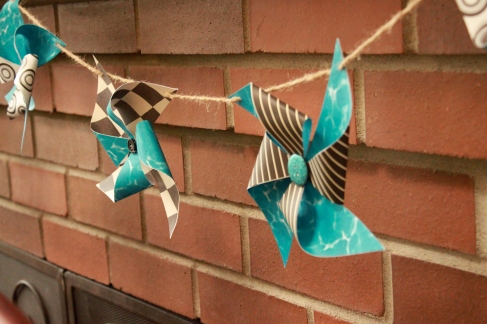
In my last post, I shared how I made pinwheels for the shower. Well, I got them all finished and strung together and hung them across the mantle.

Image

Image

Our dining room has a pass through window to the kitchen, so I decided to hang a little divider up. Something decorative but that might hide a little bit of the prep mess in the kitchen. I punched circles out of black, white, and turquoise cardstock. I then strung them together using black yarn and hung them in the pass through window. Nothing to it!

Image

Now for the food. I was in charge of dessert. My wonderful sister-in-law (not the one having the baby, obviously) made all of the food, food. And she did an AMAZING job. Wonderful chicken salad sandwiches, a delicious green salad with blueberries and a yummy raspberry vinaigrette, andĀ  a fabulous pasta salad. I fear my desserts weren’t quite as impressive. I made cupcakes. See? Not fancy at all. But I did chocolate and vanilla with chocolate and vanilla frosting to stick with the black and white theme. I also made cake balls, as pictured above. Those are my absolute fave. Sooooooo yummy! And then I did a milk and cookie display with Oreos. So cute!

Look at the fabulous cupcake toppers my lovely hubby made. Aren’t they adorable? They even have baby’s name around the edge as well as the “Happiness is a Peanut” saying.

I must say, I adore that cupcake stand. It’s just plain white plastic so I can customize it however I like with a simple ribbon. Perfection!

Okay, one more foodie thing, and then I’ll get to the games. I wanted to do lemonade but I somehow don’t own a decent pitcher. Mine are all plastic things that aren’t pretty in the least. But I do own a lovely set of mason jars that I bought for my son’s birthday party. So I poured the lemonade up into them and put them into a bucket full of ice. Cold drinks all set to go!

Now for the rest of the shower stuff. I am one of those people who actually hate baby shower games. Like, really hate baby shower games. But it’s one of those things that must be done, I suppose. So I tried to find a few activities that were has painless as possible for everyone involved. So I set a table up by the front door so that people would see it when they came in. On it was a big vase filled with peanuts and a cute little sign asking, “How many peanuts do you see?” Simple, right? Make a guess and you might win a prize! In fact, the winner took home a little Starbucks gift card.

Also on the front table was a little “Wishes for Baby” card that everyone filled out. Nothing to this one but fill it out and drop it in the box for the mama to read later.

The last game we played was a baby version of “The Price is Right.” I bought a few baby items at the store and kept track of the price of each (pre-tax). I then set them all up and passed out a game card to each person. As I showed them the items, they wrote down how much they thought it cost. At the end, they totaled up their prices and who ever came the closest to the actual total won a prize! Which just happened to be another Starbucks gift card.

Didn’t J do a great job with all of the graphics? I was impressed, anyways. The last thing I did was bake some yummy peanut butter cookies to put in my adorable “Happiness is a Peanut” bags as a little parting gift. Everyone took one on their way out the door.

So that was our party. Lots of fun and I really enjoyed putting it all together. Now I can’t wait to meet the little man it was all for!

Alphabet and Rainbows

Posted on
Alphabet and Rainbows

For some reason, I have been getting an extreme amount of “repins” on Pinterest of one of the pictures I posted from the Little Monkey’s first birthday party. I figured since there seems to be interest (and because I’m feeling a bit nostalgic since her second birthday is coming up WAY too soon) why not post some photos from the day.

Let’s start by saying that this started out as an alphabet themed party and kind of morphed into a rainbow alphabet party. It was pretty small-scale. Nothing too elaborate. Just some family members coming over to celebrate her big day. These were the invitations we sent out.

See? Super simple. The back contained all of the info, of course.

So Alphabet. That was it. Until I started finding all of these super cute ideas (thank you Pinterest) that were more rainbow themed. So I thought, why not just have the alphabet AND rainbows. To be honest, I didn’t really have any actual rainbows. More just the color scheme. But it worked.

First the decor. I kept it fairly simple since we were actually spending most of the day outside grilling hot dogs and playing in the yard. I strung up some alphabet cards across the window behind the dining room table, where I set up the cake and snacky type foods.

I know, not the best picture, but it was hard to get anything decent with the sun beating in the window. Ah well. I had some simple ABC cut outs stuck to the other windows in the dining room. Then I decided at the last minute, the night before the party, that I wanted to do a rainbow balloon garland across the opening into the dining room. So I sat and blew up balloons and tied them all together and hung them all while watching Harold and Maude with my lovely husband.

Oh! And I found an alphabet boarder at the dollar store to use. You know the kind that an elementary school teacher might have in his/her classroom? Yeah, that. I just taped it up in the dining room. You can see it peeking out from behind the balloons in that last picture. I also used some alphabet blocks from the kids on the table. I made a pyramid in one spot and spelled out the birthday girl’s name in front of her cake.

Ā Ā Ā Ā Ā Ā Ā 

Pssssst. Those cookies on the sticks over there is what keeps getting pinned over on Pinterest. Don’t worry. There’s a better picture to come.

Here’s the whole look.

The food was the fun part. The party started at 4 pm, so we wanted to have plenty of snacks available before we served dinner. For dinner we had hot dogs. My husband grilled and he set up a whole little bar area full of condiments. Any kind of condiment that you could want, including peanut butter, bacon, cream cheese, etc. And we served them up in these adorable plastic baskets lined with parchment paper. And somehow in the craziness of the day, we forgot to take any pictures of that part of the action. Oh well. C’est la vie.

So on to the stuff we DID get pictures of.

We did some fun little Caprese salads. The adults loved these! Just a cherry tomato (with the bottom cut off so it would sit nicely), a basil leaf, and a cube of mozzarella all held together with a toothpick and drizzled with balsamic. Yum!

Then there were the Jello slices. The kids totally dug these.

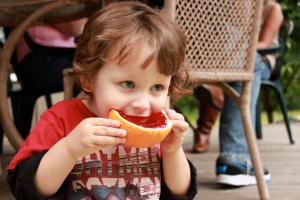
Ā Ā Ā Ā Ā  See? Here’s Monkey Man chowing down.

We had “fruit cones,” too. Just fresh fruit stuffed into waffle cones. Easy peasy. And yummy!

And of course the homemade alphabet cookies. After I cut them out, I pushed a long stick into the backs of them, and then baked. To display them, I used a wide mouth vase filled with Fruit Loops cereal. And yes, I separated the colors by hand. It actually didn’t take as long as one might think.

Ā Ā Ā Ā  And just because I love this picture.Ā Ā Ā 

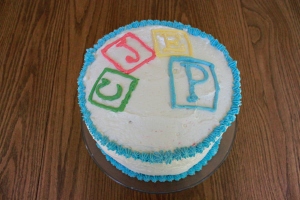
Then there was the cake. We wanted to do a rainbow cake. You know, the ones with like six layers of vibrant colored cake separated by lovely layers of frosting? Yeah, well, ours didn’t quite work out that way. We lost a couple of layers during the assembly, but I was still pretty pleased with the way it came out. My husband is always the one in charge of decorating because I just don’t have the patience (or artistic ability) for such things. This year he went with a simple design. Blocks with the Little Monkey’s initials.

Ā Ā Ā Ā  The inside….Ā Ā Ā 

She just couldn’t wait to get her hands on it!

Oh! I almost forgot about the party favors! We only had four kids at the party, so this is what I did. I found some fun colored buckets for $1 each and filled them with some alphabet stickers, an alphabet activity book and some other goodies.

Ā Ā Ā  And inside were these little cuties.Ā Ā Ā 

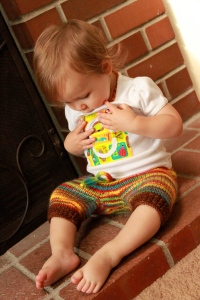
Now I didn’t design these guys. I used Rebecca Danger’s Monster Chunks pattern. They’re such a quick knit! And I used the same yarn that I used to make the birthday girl’s shorties from. My friend Christia made the adorable t-shirt. Look at those cute little monkey toes!

So that was the Little Monkey’s first birthday party. I’ve already got some ideas in the works for her next one as it’s only about 3 months away. So hard to believe. Next I’ll have to share Monkey Man’s 4th party that we just had. Muppets!!!

Monkey Man!

Posted on
Monkey Man!

So you all know that I have the little monkey, but there’s also a bigger monkey at our house. Monkey man! A few months ago, he asked me to knit a scarf for him. He’s forever asking me to make something for him when I’mĀ  making something for the little monkey. So he decided he wanted a scarf. But not a scarf like Daddy’s (just a regular old scarf), a “circle scarf” like Mommy’s (a cowl). So I searched and searched to find the manliest cowl I could find, and then altered it a bit to fit a little neck. This was the one I came up with.

And here he is modeling it.

The stoic look.

And the half-smile.

The “pirate.”

The growl.

I just love this boy.

Felt Flower Hair Pins

Posted on
Felt Flower Hair Pins

I found a tutorial a while back to make some felt flower hair clips and decided it was time that the little monkey have some. I changed it up a little to better fit my little one’s head, so I’ll show you exactly what I did.

First, my supplies.

The little juice glass and spool of thread were my circle templates. (about 2″ and 1″ respectively) I used pinking shears because I wanted a bit of texture to the edges of my petals.

And this is a sample of the hair pins I used. Like a fancy bobbie pin with a flat little circle on top.

So I traced one small circle and about 6 larger circles onto the felt and cut them out with my pinking shears. If you don’t have pinking shears, use regular scissors. They come out just as cute.

Now it’s time to start making petals.

First fold one of your big circles in half.

This is where I changed things slightly because I wanted smaller petals. So I folded it in half again.

Then fold back the top flap.

At this point, I added a little dot of hot glue under that last fold to hold it in place while I folded the other side under. It should make a little “s” shape.

Now add a little glue under the other side and in the middle as well. It just makes it all hold its shape. Go ahead and do this with the rest of your big circles.

Now it’s time to start assembling. Put a glob of glue in the center of your little circle and start attaching the petals as close together as possible.

Keep going until they are all in place.

Now it’s time to attach whatever you’re going to put in the middle. I just used a plain old button. You could use fabric covered buttons, little gem stones, pretty much anything you’d like.

And the final step, attach the flower to the hair pin. Just put some hot glue onto the circle part of the pin and attach the flower.

Ta-da!

And here’s the little monkey modeling it. She wasn’t being terribly cooperative this morning. But what’s new?

So there it is. A slightly smaller, fuller version of the felt flower hair pin. I think it came out super cute! Glad I have felt in plenty of colors around here to make more!

The hall closet. Oh my….

Posted on

I had great intentions of posting my first crafty post today. I was all set to make some felt flower hair pins for the little monkey. All I needed to do was find my pinking shears. Apparently that was easier said than done. I knew they were in the hall closet. The one that had all of the odds and ends thrown into it when we moved into the house back in May. You know, the stuff you’re just not sure where to put so you stick it there? Most people have a junk drawer. At my house, we apparently have a junk closet.

Image

Yep, it was the place where everything that entered the house and didn’t have a “real” home ended up. There were more jackets than we knew what to do with hanging in there (and some of them, I found even ended up on the floor!) There were hats and gloves and scarves and umbrellas. There were power cords galore. Crafty stuff and pillows I didn’t even know we had. And the big tub up front full of cloth diapers. That we haven’t used in months since the little monkey potty trained.

So, instead of crafting today, I cleaned out the closet. First, I took everything out. This is the picture I should have taken but I was so involved in organizing, I forgot. Oops! There was so much JUNK in there. And I have a big black trash bag full to prove it. After pulling everything out and trashing all of the junk and completely unnecessary, unusable stuff, I decided to box up the cloth diapers. I mean, who am I fooling. The little monkey isn’t going to be using them. And we’re not planning to try for another baby until at least the end of summer, so there’s no need in them sitting there taking up valuable space. So off to the garage they go until we need them again. Then came the power cords. I boxed them up, along with a few other odds and ends and sent them to the garage, too. Now I’ll know where to look when I need one! My husband and I went through the coats and took the ones we don’t wear very regularly upstairs to our closet, making it much easier to actually find the ones we DO wear. I’m slightly embarassed to admit that there were jackets and coats in there I had forgotten we even owned.

At this point, I was ready to start putting things back into the closet. I put the plastic bins back in, but this time they’re being used to hold some of my crafting supplies. Pinking shears included! Now I won’t have to dig around on the floor when I’m looking for things. And the top shelf is now housing some hats and games and the ever so important travel potty seat. What a difference an hour can make in the life of a closet!

Image

It’s nothing terribly dramatic, but whoa! I can actually see the floor! And now I know where my pinking shears are so felt flower hair pins can be done!

So Here’s the Deal….

Posted on

For my birthday this year I got a new Cricut Expression machine. And I bought a new sewing machine about a week ago after my old one died. And I’ve been seeing all of these craft blogs and thought,

“Hmmmm. I sew. I knit. I craft. I could do that.”

So here it is. My attempt at a crafty blog. I mean, why not? Everyone else is doing it! It must be the new “in” thing! And what am I if not trendy???

So stay tuned for my journey through life as a (wannabe) craftster. See what I did there? Hipster+Crafter=Craftster. Go ahead, use it as you like. I’m sure it’ll be all over the internet any day now like those “This is what I do, This is what xyz think I do” images. See I’m so hip, I don’t even know what to call them.

And I hope by now you’ve realized that I am so “un-hip” it’s not even funny. But maybe you’ll enjoy reading about my crafting adventures anyway.